


Hi there! I've been in love with making ceramics for over a decade now and if you're reading this, chances are you're also a pottery enthusiast looking to set up a ceramics studio at home. Well, you're in luck because I've been there, done that! I’ve had to set up my space over three times in a short 6 years because we’ve had to move house a few times. And while that was a huge pain, it allowed me to refine my space 3 times over - and I'm happy to share my experience with you!
First things first, setting up a ceramics studio at home can be a little challenging, especially if you are in a rental, or have small kids running around. I have both - but don't worry, with a little bit of planning and organization, it can be done. And trust me, it's totally worth it!

The first thing you need to consider is space. Make sure you have enough room to set up your studio, including a wheel, a table for hand-building and glazing, storage for your clay and tools, and if possible, a kiln. If you don't have a separate room for your studio, it’s ok - you can always set up in your garage. I’ve even seen people set up a corner of a spare room - but that requires a little more protective flooring (like Lino off-cuts and maybe a tarp or two). There are also studios that offer spaces especially for ceramicists. Finding a studio space you can rent, is a great idea of you like to separate your home life from your work life as you can lock up and leave it all behind for the day. But obviously this will cost you money. Setting up at home means you can just quickly “duck in” to check on your pots and flip them if you need to so they dry more evenly. But sometimes this means I disappear for longer than I intend and that work/home line disappears. Oops!
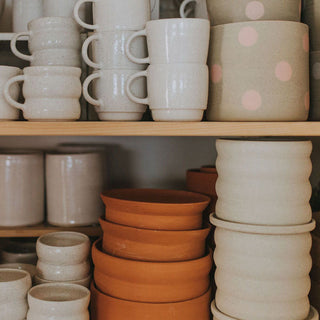
Now, let's talk about efficiency and productivity. One of the most important things to consider when setting up your studio is the flow of your workspace. Make sure everything is within easy reach, so you don't waste time searching for tools or materials. Consider the processes that your pottery goes through and set up your space with that in mind. Also, try to keep your workspace clean and organized - it'll make a huge difference in your productivity. There are heaps of studio hacks for keeping things organized.
Reclaiming clay is one of those things that most potters I know put off for longer than they’d like. While it’s a necessary evil, it can also be one of those jobs that you can do when you’re all tapped out of creativity. Wedging reclaim is mindless work, but it’s a great option if you're looking to reduce waste and save money. Plus, it's an excellent way to connect with the material you're working with and gives you a free pass to miss the gym that week! You can easily reclaim clay by soaking it in water until it becomes soft again, then drying it out on plaster bats before wedging.

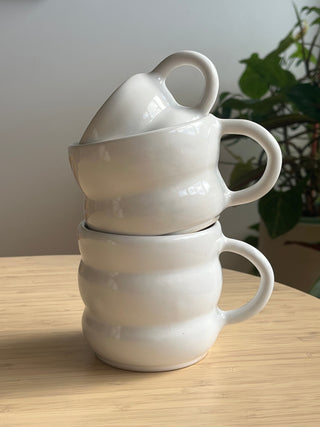
Once you have your clay ready, it's time to start creating! I love wheel throwing and have a venco direct drive wheel. I’ve set mine up with shelves all around it so it’s easy to place finished work to dry out. Hand-building is also a great option, especially if you're working with kids. When you are hand-building you may want to consider a large table to work at, a heavy duty banding wheel and perhaps a slab roller and extruder. When it comes to pottery, there's no right or wrong way to do it - just have fun and experiment!
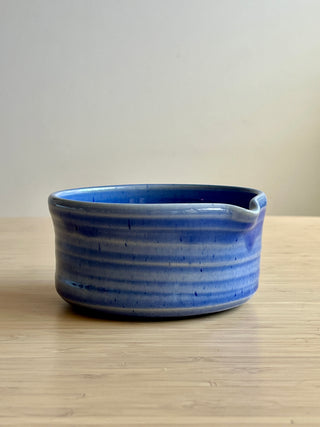
Let's talk about glazing. Glazing is the final step in the pottery process, and it's what gives your pieces their unique look and feel. There are so many glazing options out there, from matte to glossy, to textured and speckled. Experiment with different glazes and see what works best for you! You’ll want to make test tiles to you can easily see what glazes look like on various clays and keep them for reference. I store line in a bamboo cutlery divider and have about 4 stacked atop one another.
When it comes to firing your pottery, you'll need to either look into nearby studios that offer a firing service or invest in your own kiln. Packing and firing a kiln can be a little daunting at first, but it's actually quite simple. Just make sure you follow the manufacturer's instructions carefully, and always wear protective gear when working with hot materials. If purchasing a kiln for the first time you’ll want to consider size, top temperate and electrical compatibility to your outlet.

As a mum with small kids, setting up a ceramics studio at home can be a little tricky. But I've found that involving my kids in the process can actually be a lot of fun! Daisy and Leo love playing with the clay and ‘helping’ me out in the studio. Plus, it's a great way to teach them about art and creativity. I just make sure that it’s safe for them to be in there and that they understand the “rules”. The rule is to basically do what I say or get out! Lol!
Setting up a ceramics studio at home is a fantastic way to express your creativity, reduce waste, save money on external studio space rent and connect with your material. With a little bit of planning and organization, you can create a space that's efficient, productive, and fun. So go ahead and give it a try - you won't regret it! And remember, there's nothing quite as satisfying as making a piece of pottery with your own two hands.
For more tips on safety in the studio, stay tuned for a dedicated blog. There is a lot to discuss!
If you want to come along to a session with me where I talk about all this stuff in detail and also drop some super handy tool and technique tips, check to see if there are any coming up here.
